Viewing entries tagged
Paleo

Sausage and Cabbage Comfort Soup

Sausage and Cabbage Comfort Soup

All too often the idea of making dinner at home comes with an overwhelming sense of dread. You think of the effort it will take and the mess that it will make. Not to mention, your family may not even like what you’ve slaved over, making the whole process a waste of time.

I’d like to suggest homemade soup as a wonderful meal that takes little time, makes little mess, and is sure to be a hit.

Homemade soup is a wonderful way to enjoy healthy, quick meals at home. This recipe for Sausage and Cabbage Comfort Soup is packed with wholesome fiber from fresh vegetables and protein from sausage.

Make a big pot on the weekend and then reheat bowls throughout the week for fast, nutritious meals that will keep you on track with your fitness goals. Enjoy!

What you need
Servings: 20

1 ½ pounds mild Italian sausage, loose
1 large yellow onion, halved and thinly sliced
2 teaspoons garlic, chopped
4 medium carrots, peeled and sliced into ¼” rounds
1 head green cabbage, core removed and shredded
3 large tomatoes, diced
2 teaspoons sea salt (plus more as needed)
fresh ground black pepper (about 5 cracks)
1 teaspoon ground sweet paprika
8 cups chicken broth
Basil leaf to garnish *optional

Instructions

1. Brown the sausage at the bottom of a large soup pot over medium high heat, breaking it into small pieces as it browns. Remove the cooked sausage from the pot and set aside in a bowl, leaving the oil from the sausage in the pot.

2. Add the onions, garlic and carrots to the pot with the hot oil. Continue to cook over medium high heat, stirring often as the veggies become tender, about 5 minutes. Add the cabbage and tomatoes, and continue to cook, stirring often, for 5 minutes. Mix in the remaining ingredients and bring the soup to a low simmer for 20 minutes.

3. Add more salt and pepper to taste and serve hot. Enjoy!

Nutrition
One serving equals: 116 calories, 7g fat, 7g carbohydrate, 2g fiber, and 6g protein.

Courtesy of RealHealthyRecipes.com

I hope that you get a chance to give this recipe a try this week. Remember that I’m only a call or email away to assist you in all things fitness. And if you are not yet one of my prized clients then call or email me now to set up your first workout – I’d love to help you! ~Trina

Butternut Apple Ginger Soup

butternut
butternut
  • 4 pounds whole butternut squash (about 2 medium), halved lengthwise and seeds removed
  • 2 tablespoons unsalted butter (1/4 stick)
  • 1 medium Granny Smith apple (about 8 ounces)
  • 1/2 medium yellow onion
  • 8 fresh sage leaves
  • 2 1/2 cups low-sodium vegetable or chicken broth
  • 2 1/2 cups water
  • 1 1/2 teaspoons kosher salt, plus more as needed
  • 1/4 teaspoon freshly ground black pepper, plus more as needed
  • 1/3 cup heavy cream
  • 1/2 cup toasted pumpkin seeds, for garnish (optional)
  1. Heat the oven to 425°F and arrange a rack in the middle.
  2. Line a baking sheet with aluminum foil. Place the squash pieces cut-side up on the baking sheet. Melt 1 tablespoon of the butter and brush all of it over the tops and insides of the squash halves (alternatively, you can rub it on evenly with your fingers). Season generously with salt and pepper. Roast until knife tender, about 50 minutes to 1 hour.
  3. Meanwhile, peel, core, and cut the apple into medium dice. Cut the onion into medium dice. Melt the remaining tablespoon of butter in a large saucepan or Dutch oven over medium heat. Add the apple, onion, and sage, season with salt and pepper, and cook, stirring occasionally, until softened, about 7 minutes. Remove the pan from the heat and set aside.
  4. When the squash is ready, set the baking sheet on a wire rack until the squash is cool enough to handle. Using a large spoon, scoop the flesh into the saucepan with the sautéed apples and onions; discard the skins.
  5. Add the broth, water, and measured salt and pepper, stir to combine, and bring to a boil over medium-high heat. Reduce the heat to medium low and simmer, stirring occasionally and breaking up any large pieces of squash, until the flavors meld, about 15 minutes. Remove the pan from the heat and stir in the cream.
  6. Using a blender, purée the soup in batches until smooth, removing the small cap (the pour lid) from the blender lid and covering the space with a kitchen towel (this allows steam to escape and prevents the blender lid from popping off). Alternatively, use an immersion blender. Taste and season with salt and pepper as needed. Serve garnished with the pumpkin seeds, if using.

http://www.chow.com/recipes/30466-roasted-butternut-squash-soup

Homemade Coconut Butter

coconut butter YES!! you Can make your own coconut butter.

All you need is Full Fat Unsweetened Coconut

and a reliable blender

Instructions

Homemade Coconut Butter: Take your shredded coconut  and simply blended it in your blender for about 3-5 minutes. (Note: If you use a food processor, blend for 10-ish minutes.) That's all there is to it!

Side note: Depending on where you live--and the temperature/altitude--you might have trouble with this recipe. It works perfectly for me, just a little patience. Coconut butter is very temperamental and reacts oddly in different climates. So please know before trying that there's a chance this recipe might not work for you. Also, if it refuses to turn to butter for you, it might be worth a shot to add some coconut oil to the blender... sometimes that fixes things right up!

These instructions are provided by Chocolate Covered Kate's Blog. She has a FAQ page to guide you along.


Grain Free Nut Free Pumpkin Pancakes

pancake The world according to pumpkin facts over one billion pounds of pumpkin are produced each year in the US.  Scientifically speaking, pumpkins are a fruit (they contain seeds) but when it comes to cooking, they are often referred to as vegetables. Pumpkins are low in calories, 100 grams of pumpkin produces around 26 calories of energy. Thanksgiving is a time that I pull out all my favorite pumpkin recipes.

Pumpkins were an important food source for the pilgrims, as they stored well, which meant they would have a nutritious food source during the winter months. It is documented that pumpkins were served at the second Thanksgiving celebration. When mentally picturing an early Thanksgiving, we usually think of a Pilgrim woman in a bleached starched white apron holding a pumpkin pie with a perfectly fluted crust . The truth is in fact, quite the opposite. The Pilgrims cut the top off of a pumpkin, scooped the seeds out, and filled the cavity with cream, honey, eggs and spices. They placed the top back on and carefully buried it in the hot ashes of a cooking fire. When finished cooking, they lifted this blackened item from the earth with no pastry shell whatsoever. They scooped the contents out along with the cooked flesh of the shell like a custard. Yumm! The Pilgrims were also known to make pumpkin beer. They fermented a combination of persimmons, hops, maple sugar and pumpkin to make this early colonial brew.

I did not make pie or beer but I did create a pumpkin pancake that the kids loved! The best part is they are grain free and nut free. Double bonus!

Let's Get Started

Yields about 8 - 10 3" pancakes.

4 eggs at room temp

2 heaping TBL of pumpkin  I used this kind

1 TBL Honey

1/4 - 1/2 cup of coconut flour

1/2 tsp salt

1/2 tsp baking soda

cinnamon to taste

nutmeg to taste

ghee or coconut oil to fry your pancake

The down and dirty:

combine your eggs, pumpkin, and honey in a food processor. slowly add in your dry ingredients. You want the batter drippy enough that it comes off the spoon easily, and spreads out in your pan. If you get it to dry - add a little bit of water to thin it out. Fry up in your pan - be cautious when flipping. These were delicious with a serving of honey or maple syrup on top.

Enjoy ~


End of Summer Marinade

summer

I am always looking for a change up when it has to do with chicken. BBQ Chicken is by far a staple in our house.

Here is a simple sweet and savory Marinade without all the usual suspects (sugar, soy sauce, etc.)

1/4 cup Coconut Aminos

2 TBL Coconut Sugar

1 Clove Garlic Minced

1 TBL Fresh Ginger Minced

1 TSP Chili Flakes

1 TBL Sesame Oil

Large Ziplock Bag

4-6 Chicken Breasts or Large Boneless Thighs

Place all in your Ziplock Bag - Seal Tight and lie flat in your fridge for about 4 hours or over night. You can double the recipe and save half for a sauce after you have cooked your meat. You would slowly cook half the marinade in a small pot until it reduces down and thickens up...pour over your chicken.

Brussels Sprouts and Bacon Slaw

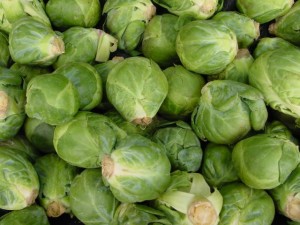
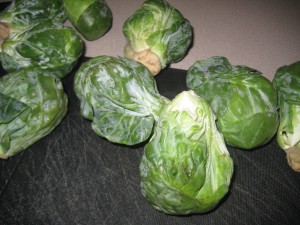
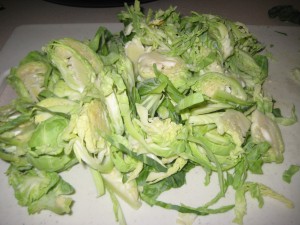
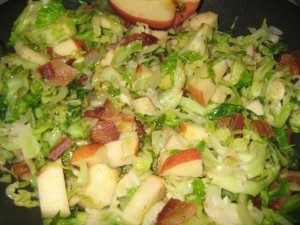
brusselssprouts It seems that I gravitate towards some veggies more than others and this time of year we are getting large bags of Brussels sprouts in our Bountiful Basket. If you grew up hating Brussels Sprouts this is a sure bet it will change your mind. My theory is that by slicing them thin and then of course adding bacon to anything it will be a hit!

Ingredients

1 pound of Brussels Sprouts sliced thin

1 large apple or 2 small ones cut into bite size pieces

5 slices of bacon

Place the bacon in a large, deep skillet, and cook over medium-high heat, stirring occasionally, until evenly browned, but not crispy, about 10 minutes. Remove the bacon with a slotted spoon, leaving the grease in the skillet. Pour off all but 2 tablespoons of the bacon grease.

Cook in your thinly sliced brussel sprouts. Season with salt and pepper. Cook and stir until it softens, 5 to 7 minutes. Add in your apple cook another 2 minutes. Add your bacon back in and warm through.  Serve with a side of your favorite meat or bowl of soup.

Super Easy and this dish holds well for leftovers.

Evee 222Evee 218Evee 221


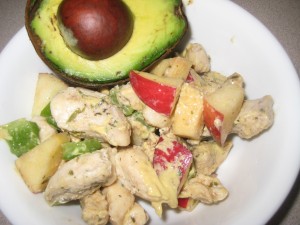
Sweet Chicken Salad

jar I don't eat mayonnaise - never have really. I go dry. As I got older I started using more spicy style mustard.

I hate it when I am doing laundry and I try so hard not to totally dry my sorta nice work-out clothing, the dry wick kind....just to find out as I am folding my clothes that I totally baked my work-out clothes. I guess that is why I never buy nice clothing - cause I will totally ruin it.

This idea is great when you have left over chicken in the fridge and it is starting to dry up on you. Okay maybe your chicken isn't dry but I always over cook my chicken.

For your Salad

2 large chicken breasts, cooked and cut up into bite size pieces

1 medium sized apple cut into bite size pieces. The sweeter the better

1 small green bell pepper, diced

For your Dressing

1 ripe avocado

2 tablespoons of mustard preferably a Dijon type.

2 tablespoons of olive

water as needed

1 tsp dried tarragon

1 tsp dried parsley

S/P

Mix your salad fix- ins into a bowl.

Prepare your dressing by adding in your avocado, mustard, olive oil and a tablespoon of water into your blender. Puree until smooth adding in more water as needed.  Pour over your salad along with your spices and stir together. Chill for about 15-20 minutes.

Then Eat!

Evee 234


Zucchini Garlic Soup

This recipe is inspired for two reasons. Well actually three reasons. #1 I had an abundance of zucchinis from my garden. #2 Zucchini is super cheap to buy most of the time. #3 Baby its cold outside, and who doesn't want to snuggle up with some soup. This is a super duper simple soup to make - and it can be made ahead and store in the fridge for later use or stocked up in the freezer for a quick add to dinner.

Olive Oil (coat the bottom of your pot) 1 white onion, sliced 8 to 9 large cloves garlic, sliced thinly 4 medium zucchini, about 1 1/2 pounds 4 cups chicken or vegetable broth 1/2 teaspoon powdered ginger Salt and pepper

Heat the oil in a heavy 4-quart pot over low heat. Add the sliced garlic and onions and cook on medium-low heat for about 10 minutes, or until the onion is soft and translucent. Keep the heat low enough that the garlic doesn't brown; you want everything to sweat.

When the onions are soft, add the zucchini and cook until soft. Add the broth and bring to a simmer. Simmer at a low heat for about 45 minutes. If you want a less bitter zucchini taste (which sometimes zucchini has) you can peel your zucchini before adding to the pot.

Let cool slightly, then blend with an immersion blender until creamy, or transfer to a standing blender to puree. Be very careful if you use the latter; only fill the blender half full with each batch, and hold the lid down tightly with a towel.

Taste and season with ginger, salt and pepper. Like most soups, this is significantly better after a night in the refrigerator to let the flavors meld. If you want a creamer richer tasting soup - add about 4 ounces of canned coconut milk to the blended soup.


This recipe was inspired by http://www.thekitchn.com/recipe-zucchini-1-32520